How To Install A Smart Thermostat
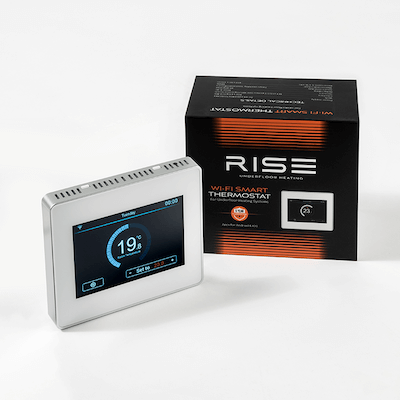
12/01/2024In today's fast-paced world, technology has seamlessly integrated into our daily lives, making even the simplest tasks smarter and more convenient. One such advancement is the smart thermostat, a device that not only enhances your home's energy efficiency but also provides personalised comfort. In this blog post, we explore how a thermostat works, and the installation process.
How Does a Thermostat Work?
Before diving into the installation, let's understand the fundamentals of thermostat functionality. A thermostat acts as the brain of your heating and cooling system, regulating the temperature with the help of a sensor cable installed in the floor. Traditional thermostats use a simple temperature-sensitive switch to turn the system on or off. Smart thermostats, on the other hand, leverage advanced technology to offer remote access, scheduling, and energy-saving features.
What Types Of Thermostats Are There?
Our selection of thermostats are designed to work seamlessly with your underfloor heating system allowing you to easily control and adjust the temperature in your home with precision and convenience.
Our collection includes a range of options to suit your needs, from the simplicity of manual thermostats to smart touch of digital Wi-Fi thermostats. Many of our digital thermostats are accompanied with various control systems, such as smartphone apps or smart home assistants, giving you the flexibility to manage your underfloor heating remotely.
Read More:- Electric UFH vs. Water UFH: Choosing the Right Underfloor Heating System
- The Pros and Cons of Underfloor Heating
- 8 Reasons to Get a WiFi Thermostat for Your Underfloor Heating System
Installing A Smart Thermostat: A Step-By-Step Guide
If you've recently purchased a smart thermostat from Warm Floor Store, this step-by-step guide will help walk you through the installation process, ensuring you harness the full potential of this cutting-edge technology.
It’s important to note that this is a simplified guide, it is always best to work with a professional, and that every heating product on our website has its unique data sheet that will advise on the installation process, so make sure you follow those guidelines for smooth installation.
Step 1: Choose Your Smart Thermostat
Don't settle for less when it comes to your comfort and efficiency, choose one of our high-quality underfloor heating thermostats from top brands such as Warmup, Schluter, Amber, Devi, Rise, Thermosphere, Harmoni, Mapei, Heatmiser, and more, to experience the ultimate in-home comfort and control.
Step 2: Gather Your Tools and Materials
Before diving into the installation process, it's essential to gather the necessary tools and materials. You'll typically need a screwdriver, wire strippers, a level, and possibly a drill. Make sure to turn off the power to your heating system before proceeding to ensure safety.
Step 3: Turn Off the Power
Safety should always be a priority during any installation. Turn off the power to your heating and cooling system at the circuit breaker to avoid any electrical mishaps.
Step 4: Remove the Old Thermostat
Carefully remove your existing thermostat from the wall, exposing the backplate and wires. Take note of the wire labels or colours; this information will be crucial during your smart thermostat installation.
Please note that we recommend that a qualified electrician carries out any electrical work.
Step 5: Install the New Thermostat Base
Mount the new thermostat base to the wall using the provided screws and a level to ensure it's straight. If necessary, use a drill to make pilot holes for the screws. Ensure the base is securely attached before proceeding.
Step 6: Connect the Wires
Refer to the smart thermostat's manual for guidance on connecting the wires. Use wire strippers to expose the necessary length of wire and secure them tightly.
Step 7: Attach the Thermostat Display
Once the wires are connected, carefully attach the thermostat display to the base. Most smart thermostats simply snap into place but refer to the product manual for specific instructions, and make sure not to apply pressure to the screen of the thermostat when fitting into place as this can cause the screen to crack, apply pressure to the frame.
Step 8: Power On and Configure
Turn the power back on at the circuit breaker and follow the manufacturer's instructions to configure your smart thermostat. This may involve connecting the device to your Wi-Fi network and setting up personalised preferences for heating schedules and temperature adjustments in an app.
The Smart Thermostat Installation Process
By taking these steps to install a smart thermostat, you're not only embracing the latest in home automation but also contributing to a more energy-efficient and comfortable living space. Enjoy the convenience of controlling your heating system with just a few taps on your smartphone, and revel in the warmth and savings of a smart home.
Whether you're a Tradesman, Builder, Tiler, Floorer, Architect, or even a DIY'er we've got you covered. Going the extra mile for our customers is second nature to us, so if you can't find what you're looking for on the website please do not hesitate to get in touch with our sales team on 01604 815711 or email your queries to [email protected].


